
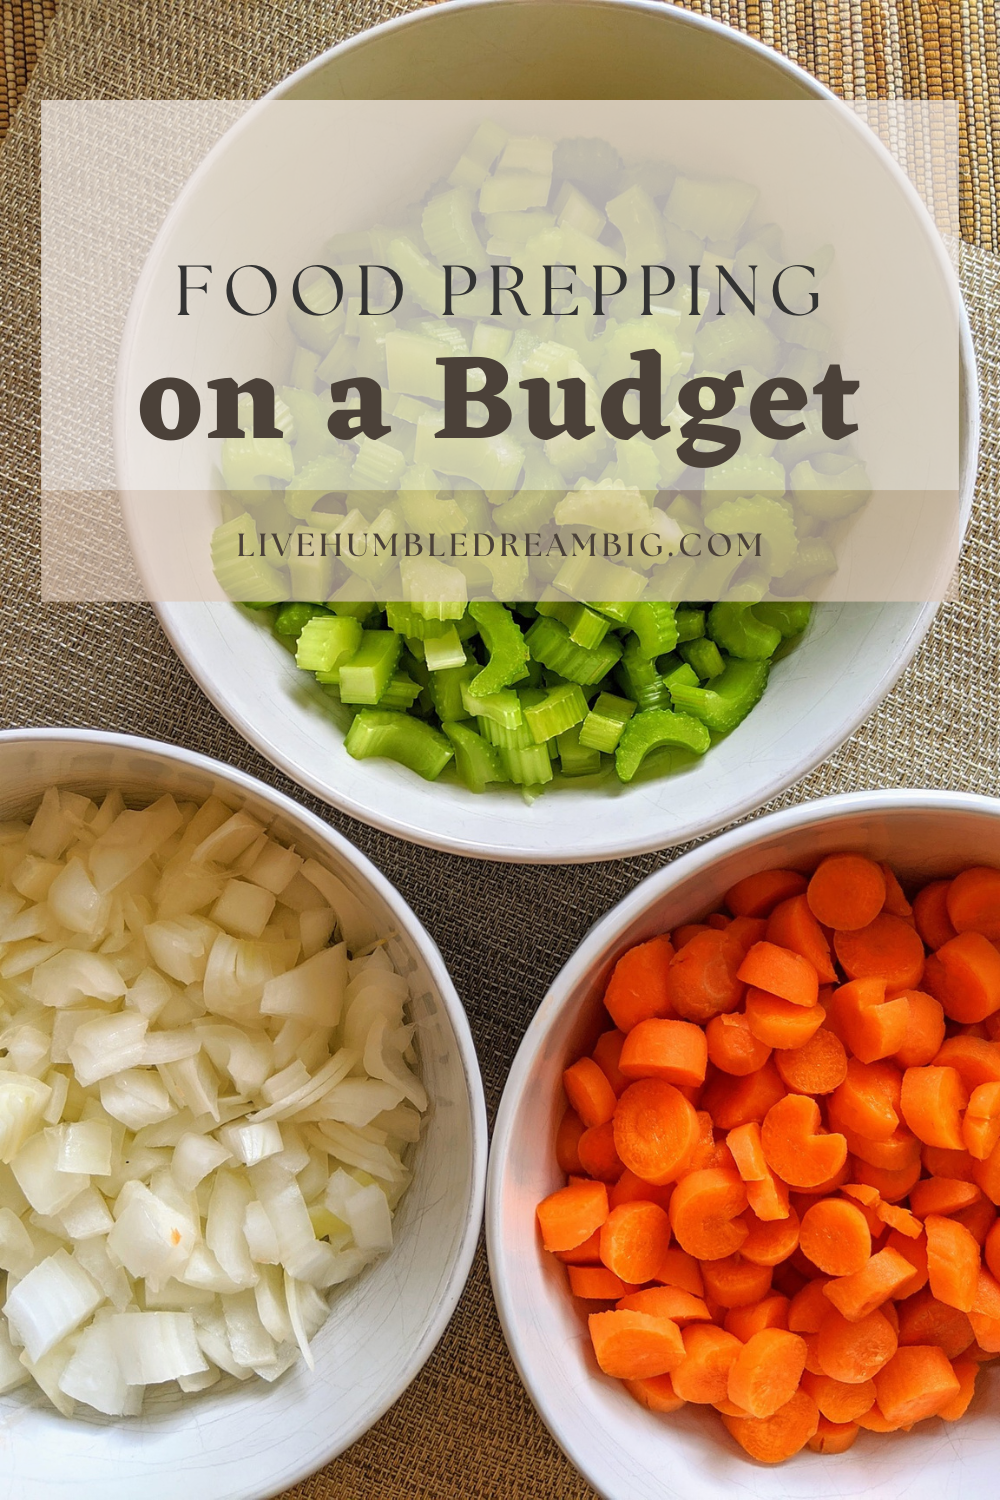
Keep it Simple | Part 3 – How to Meal Prep on a Budget
Keep it Simple | Part 3 – How to Meal Prep on a Budget
Meal Prepping has kind of created a life of it’s own these past few years, hasn’t it? Especially with all the Meal Prep Services out there now, Meal Prepping is a trendy kinda thing. Most people, when they think of Meal Prepping, imagine a neatly organized fridge, with stacks of identical containers containing a week’s worth of meals. Or, perhaps you imagine a full stand up freezer, jam packed with 30 days+ of dinners & 400 individually wrapped Breakfast Burritos. Sure, those are all amazing ways to prep food ahead – saving time, money & brain power – but there are some smaller ways, too, that we can prepare our ingredients and food to Eat Healthy on a Budget. Let’s do a quick rundown of some of the most popular ways to Meal Prep, and discuss some strategies for how to Maximize your time each week so that you have access to that healthy food you spent your hard earned money on and more time for what matters most to you!
We’re going to go over the basics of what you’ll need and then run through some ideas, tips and tricks that I’ve picked up over the years from my own experience and/or learned from others. Having a mentor – someone who’s been there – is such a blessing, whether you’re just starting out in life or have already traversed some terrain – we all need some-bodayyy, to leeeeeheeeheeeean on. (Please tell me you sang that last part out loud) Without further Ado:
Get Prepared
There is a method to all madness, there is a strategy to everything we do in life – whether we realize it or not! We all have our routines, familiarities and little quirks that we don’t even really notice until someone else points them out. If you’re naturally organized and prepared with a fully stocked kitchen for prepping any kind of food – you can probably skip down to the Tips & Tricks part, but the following are some suggestions of supplies you may want to have on hand to maximize your efficiency and time in the kitchen.
Containers
Firstly, if you don’t have dedicated containers I recommend grabbing some. I’m not a fan of plastic anything – but I do use these amazing Freezer Containers for soups, broths & other liquid meals & ingredients. Nothing keeps frost away like they do, plus they’re extremely durable (you can use them over and over & they can handle the top rack of the Dishwasher!). I also keep a variety of baggies on hand at all times, because they truly are one of the best ways to store certain items – I even freeze pre-cooked meat in them sometimes, laying them flat to freeze – they stack easily once solid & defrost in no time for lightning quick dinner options! I also highly recommend Mason jars of various sizes, rings/lids for them & Food Saver Vacuum Bags / Roll if you have a Vacuum Sealer.

I also love storing food in bulk, so I make sure to always have some extra 5 gallon buckets on hand (If you have any small local delis, butchers or pizza shops in the area – call or stop in and ask them if they have some extra food service buckets – these work great and you can be sure that they are food safe!), a few large Storage Totes and I am notorious for saving anything with a lid (if the shape is right). My oldest son used to pick on me all the time for saving so many empty jars/containers. We buy our Local Raw Honey in bulk, so I always have these amazingly huge 6 quart jars with lids on hand – they used to be glass but they recently switched over to plastic (bummer). Oh well, I still store dry goods in them, but they used to be my go-to for fermenting/Kombucha making!
Small Appliances / Utensils
Some things that I find essential in my kitchen when it comes to food prepping are below. You may or may not find these useful, depending on how involved you want to be in the Prepping process and what you already have on hand to utilize.
- Dehydrator – I adore my Dehydrator. It usually stays in my kitchen, despite it’s cumbersome size, because it’s used that often. This is great for preserving fruits, veggies & herbs, but also making your own Jerky is a huge money saver. I recently have begun dehydrating diced Bell Peppers & Onions & grinding them up in my blender to create my own custom spice blends – so delicious! The sky is the limit here, you will find all sorts of things to dehydrate once you start! I have dehydrated my Sourdough Starter to share with friends – it doesn’t need to be fed once dehydrated, and can be rehydrated/fed to bring it back to life fairly quickly!
- Vacuum Sealer – There is something satisfying about watching all of the air get sucked out of a back slowly. In fact, before I had a vacuum sealer I used to use Ziploc Freezer Bags & seal them most of the way, leaving a small gap near one end, press out as much air as possible & insert a straw, sucking out as much air as I could before sealing. This isn’t as efficient, looks quite funny and the air does get back in slowly, but it works in a pinch! Vacuum Sealing is great because by removing the air from your food items, you’re extending their life greatly! Oxidation really advances the decay of food and reduces shelf-life! Freezer burn will be a thing of the past.
- Pressure Cooker / Instant Pot – I don’t remember life before my Instant Pot. Truly, it has cut down significantly on my kitchen time. For some reason, I can throw all of my soup or chili ingredients in my IP, engage the lid, walk away & come back to perfectly delicious food – if I try that on the stovetop, I need to constantly monitor & stir the food, not to mention how much longer it takes! I love my Pressure Cooker for many things, and it actually earned it’s place on my counter because it’s used so often that it doesn’t make sense to put it away. We even make our weekly Yogurt & Sour Cream in it! I have made Bone Broth in my IP before, but I prefer the old fashioned 24 hours+ on the stove top method for this, I feel like the longer cooking time truly improves the quality of the broth & maximizes it’s nutritional benefits. I also always soak & slow-cook all beans, for the proper assimilation of nutrients & decrease of antinutrients, rather than resorting to my IP.
- Canning Equipment/Supplies – Many people think Canning is “old school” and don’t even bother – “why would I do that? I can buy cans in the grocery store!” they say. But there are lots of downsides to buying prepared cans of food, including but not limited to: BPA, Aluminum, added ingredients/preservatives, freshness/quality concerns. If you’re willing to learn the skill of canning you will not only increase your stockpile, decrease your food budget & be prepared for anything – you’ll also have a highly desired skill that you could pass down to future generations & teach to others!
- Pots & Pans – It’s nice to have a collection of various sized pots, pans & lids. I am partial to Cast Iron and have quite a few pieces in my collection; Other than Cast Iron, we only use Stainless Steel/Glass. I wouldn’t touch Non-Stick/Teflon with a 32 and a half foot pole. Check out the Documentary/Movie Dark Water if you want a quick rundown on the corruption behind Teflon & the dangers of it. My favorite place to purchase pots & pans is yard sales & thrift stores! I’ve found some super cool Dutch Ovens, Stock Pots & more at amazing prices doing this!
- Knives – If you don’t have a good knife, get yourself two. At the minimum you need a good Chopping knife & a good Bread knife. For years, even after I considered myself pretty comfortable in the kitchen, I used a knife that we impulse bought at Walmart when some guy was doing a demonstration on how he could saw away at a steel hammer & then his knife was still sharp enough to effortlessly slice tomatoes as thin as paper. It was a cool concept, but the knife was way too long – which made it flimsy, and it also was for sawing, not chopping. I made due with it for years, but finally upgraded and I’ve never looked back. My favorite bread knife is under $15 on Amazon, and although I was skeptical at first – thinking anything that cheap must not be good, the reviews sold me and I am so glad I purchased it! It’s been amazing, and I was even able to get rid of my “Bread Slicer Helper” because I can just freehand cut my bread now with great accuracy!
- Cutting Board(s) – I have two wooden cutting boards, one was passed down from my husband’s mommom & the other I purchased years ago and it’s still going strong. Some people like the plastic ones for chopping/prepping raw meat on, but I typically just use a cookie sheet for this. The last thing I need is more stuff in my kitchen, and plastic cutting boards are so situational, they haven’t earned a spot.
- Parchment Paper – Great to have to separate certain foods, bake/cook on as an alternative to foil (think, toxic aluminum) & roll out dough on for easy cleanup! I used to buy this in bulk by the roll, but now I much prefer the convenience of individually cut sheets which fit perfectly on my cookie sheets!
- Cookie Sheets – Having various sizes of cookie sheets, jelly roll pans & sheet pans is great. I use my cookie sheets constantly for Flash Freezing – such a great asset for prepping food.
- Plastic Wrap / Foil – I don’t use either of these very often anymore. If I’m cooking for a crowd, I’ll typically use it then for saving money / quick clean up, but it’s not my first choice. Beeswax wrap is much safer, more environmentally friendly & saves a ton of money because it’s reusable! Oh, also let’s talk about how super cute it is, it comes in a variety of fun colors & designs!
- Freezer – Ok so, that’s not a “small” appliance, but I didn’t want it to be alone in it’s own category, so it’s gonna hang out here. If/when you have it in your budget, grab yourself a standup freezer. You can probably even find one on Local Marketplace or Craigslist. Chest Freezers seem nice, have a lower profile and provide additional workspace because of their counter-level surfaces, but it’s so hard to find anything in them. If you buy meat in bulk (think half cow, etc) and have a ton of the same cut of beef, etc. a chest freezer could definitely work. But, for finding things quickly and staying organized, I 100% recommend a stand up freezer.

The Flow
My favorite way to plan out how I’m going to Prep my food is by observing myself over a few week period. I go through trial and error, seeing what works and what doesn’t, and take notes accordingly. Of course every so often, I do an audit and change things as needed. Eventually we all fall into Routines – whether we realize it or not – and routines can make us or break us. Just think about something here for a minute… when dinner time rolls around are you: calm, cool and collected or panicking because you forgot to defrost the meat and you need to chop 4 cups of veggies while a toddler is hanging on your leg and someone needs a ride to piano practice? Try to think ahead, my post on Planning will give you some tangible tips on how to arrange your menu and time to make this a more streamlined process.
When you’re considering roasting a large piece of meat, portion out enough for each person (and any leftovers you may have planned in for the next few days lunches, etc) and freeze the rest immediately. I can’t tell you how many times in the past I waited to freeze meat or even large amounts of soup, thinking we’d polish it off before it went bad – next thing you know, I’m digging in the recesses of our refrigerator trying to find that awful stench, and – oh look, it’s last week’s potato soup – or is that old yogurt? Ugh! Make sure you’re not wasting food, this is a much larger problem than we realize. FeedingAmerica.org says that nearly 40% of all food in America is wasted.. That’s staggering to think about! With all of the hungry mouths in America alone, and we are wasting 119 billion pounds of it annually? I don’t know about you, but I don’t want to be a part of that statistic! Some waste is inevitable, especially as you find your flow and what works for your family, but proper planning and prepping can really cut down on this!
When I plan our weekly menu, I always notate the Prep that needs to be done along with our daily meals. For example, if I know that we’re having Pizza on Friday night, I write “Soak Yogurt Dough” in my Thursday evening note area – this reminds me that while I’m making Thursday night’s dinner, I can start my Yogurt Dough, which soaks for 12-24 hours – perfect timing! If we’re having rice or beans, those get soaked as well. Eventually I plan to get a NutriMill Grain Mill, because I’ve even sprouted my own grains before (which consists of 2-3 days of love and care – this kind of stuff requires prior planning/prepping!).
So as you can see, you’ll eventually fall into a rhythm that works for your family and specific foods you eat on a regular basis.
Prep it!
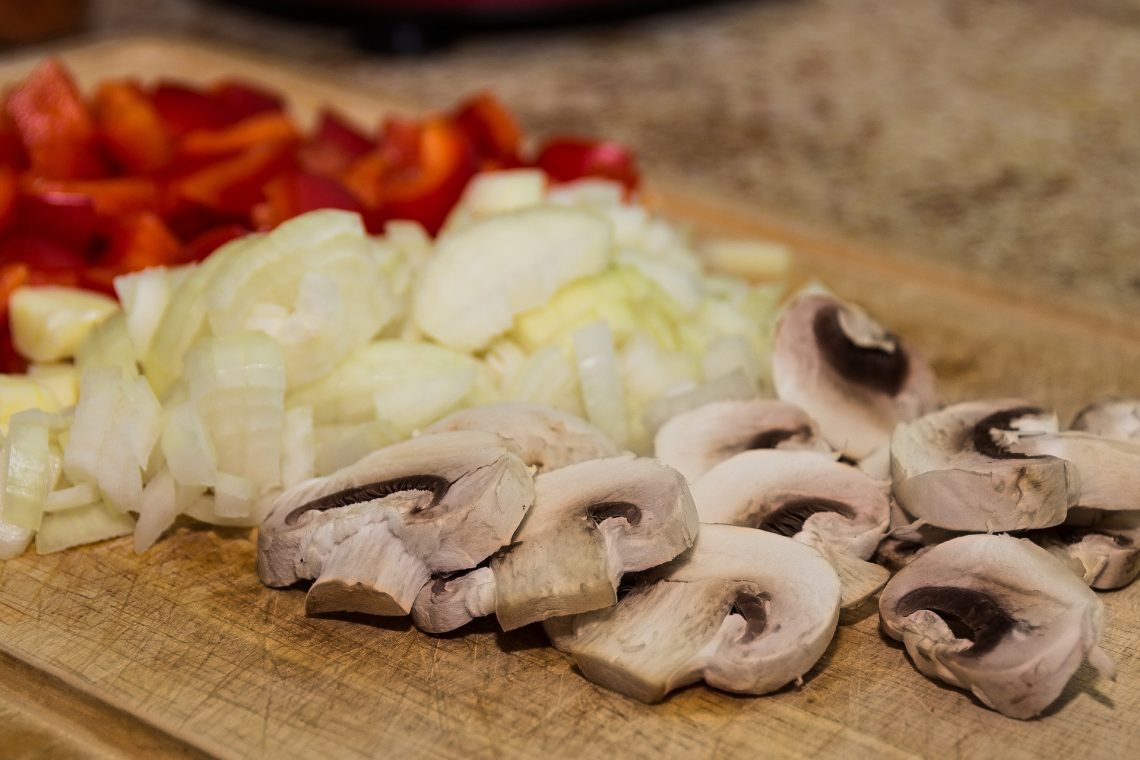
There are lots of different methods for getting ingredients “ready” for making weeknight meals quickly.
Many vegetables and fruit can be chopped 2-4 days ahead of time and, stored properly, will be nearly as good as fresh. Some oxidation does occur and some nutrient value is lost doing this, but it just really depends on your time & what works for you. For me, if I am making Veggie Soup for dinner and I know that we’re having eggs & potatoes for breakfast tomorrow, I’m totally chopping extra and soaking them in filtered water to make tomorrow’s job easier.
When I used to buy fruit, a lot of times it would just sit in the refrigerator unless I encouraged my children to snack on it! This was also due to the fact that we used to have a lot more processed snack foods than we do now (way easier to grab, and initially more satisfying), but another reason was the prep required! Kids are funny like that, if they gotta peel an orange or apple they might just pass! I started chopping up melons & berries for the day some mornings, depending if we had a dedicated lunch planned or not. I also occasionally peel & chop a few apples & soak them in lemon or orange water and pop them in the fridge to take out for a quick snack during Homeschool.
Bread
We rarely buy bread anymore, and when we do it’s sprouted – because the other kinds are too hard to digest. These days I mostly make our own Sprouted Bread or Sourdough, and I make it when we have sandwiches or cinnamon toast on the menu, because it only keeps for a few days. I’m always aware of this, so when it’s about to go bad I will sometimes toss it in a baggie and put it in the freezer to make breadcrumbs or stuffing with at a later time (I try to do similar tasks together to save time/brain power, so if I’m making breadcrumbs for example, I’ll also be working on other stuff to put in my dehydrator or oven, or chopping veggies while they dry out, etc! Efficiency is the name of the game when it comes to time-saving budget-friendly kitchen hacks!
Flash Freezing
Flash Freezing is a great way to prep large quantities of food while having appropriately sized portions ready when needed. Instead of shoving your food into a freezer bag or Foodsaver bag all together, removing the air and freezing (you’re gonna end up with one big lump of food!), you’re going to lay everything out on a cookie sheet (make sure it’ll fit in your freezer, laying flat), put it in the freezer until hard (an hour or so should do it) and then load it into your bag. Doing this prevents everything from sticking together or clumping up, and makes portioning when you need it a lot easier.
This works great for bread, muffins, cookies, raw cookie dough, pizza dough, veggies & fruit (think: smoothies!) and even some liquid items (you can freeze, for example, Tomato Paste (who ever uses the entire can in one meal?!) in ice cube trays (I def recommend having a dedicated tray for this, as it stains and imparts flavor) and then once solid, pop them out and freeze all together in a baggie! Voila! Perfect 1oz (2 Tbsp) servings, ready to go! You can also do this with excess eggs – although the texture won’t be good for eating fresh, they’re still perfect for baking, milk about to expire, and so much more!
Yogurt for Days
Yogurt is a family favorite around here, it pairs perfectly with my Sprouted Granola & some fresh fruit. To be perfectly honest with you, it’s almost similar in price to buying Grass-fed Yogurt from the store depending on where you go. I occasionally just purchase it at our local mom & pop shop – Martindales. They sell a Glass Jar with Raw Grass-Fed Yogurt for $5.99, and after I factor in the price of a half gallon of Raw Grass-Fed Milk & the (minimal) cost of electricity to make it in my IP, it’s only about a dollar savings. However, there’s something special about making your own food, so I continue to do so most weeks. It’s super easy to make your own yogurt, and would definitely be even cheaper depending on what type of ingredients you use and what your specific local prices are! I also make Sour Cream / Creme Fraiche using a similar method (recipe from Nourishing Traditions Cookbook). Making homemade Yogurt is great because you can substitute it in many recipes that you would normally use sour cream or buttermilk in and it’s also one of the main ingredients in my favorite Pizza Dough!
Who Cut the Cheese?
We love cheese in this house. I buy half pound blocks of it from the same place that I get our other Raw Dairy products, and it’s so good. You haven’t had cheese until you’ve had Raw Cheese. Raw Dairy is amazing because not only is the flavor impeccable, but all of the enzymes are intact and it’s so good for your gut and your body. Comparatively, the price isn’t much higher than the processed, fake American Cheese in the grocery store deli! I just use my little handy-dandy cheese slicer and slice a block or so at a time, so that we have it for sandwiches, omelets and general everyday snacking purposes. I usually keep several blocks on hand for shredding purposes also. We put it on broccoli, in soup & also make Nacho Cheese sauce with it for fries, tortilla chips & even eating right off of a spoon – delightful!
Think about it
I hope by now you took my advice and started keeping a Notebook! Notebooking is so useful for honestly every part of your life. It’s amazing how much more productive and peaceful you can be once you do daily Brain Dumps & clear up the clutter from your mind! I use my Food Planning Notebook for this, and I just take notes in the margins of my weekly Shopping List / Menu. I simply observe how our week went, and make any adjustments necessary. Did I buy Parsley and it went bad before we had a chance to use it? Next time I need to make sure to either roll it up, single file, in a paper towel to extend it’s life or dehydrate it if I need it to last more than a week. Was the Chili a huge hit and had everyone asking for more the following days/week? Next time, triple it and freeze it in individual portions for quick lunches on the fly!
There are so many ways that you can save time, money & effort in the kitchen, just by making simple, little changes to what you’re already doing. Figure out what you’re already doing that works well, and build off of that. I hope you found these tips and suggestions useful, and I pray that they’ll help ease the load on your shoulders, even if just a little. In part 4 we are going to discuss Grocery Shopping, which is where you’ll begin to see how implementing things like a budget, planning ahead, prepping & stocking up on staples can really bring it all together.


You May Also Like
Keep it Simple | Part 4 – How to Grocery Shop on a Budget

What is Monosodium Glutamate (MSG)?
